What is in a payment link?
A payment link is a Loop-hosted payment page that allows a customer to purchase one or many products, start a subscriptions or pay an invoice. Your customers click a button on your site and get redirected to a payment page hosted by Loop. Payment links are designed to be a customizable and reduce your development time. To create a payment link, merchants define the Stripe products (using Stripe’sprice-ids) they would like the customer to see and purchase. Payment links can be created with no-code by using the company dashboard or by calling the Checkout Sessions Endpoint.
Payment links can:
- Take an immediate payment for an invoice, product purchase, or subscription purchase and record the customer, invoice, and subscription in Stripe
- Take immediate payment for an existing Stripe subscription and set future invoices for that subscription to be paid by crypto
- Collect a payment method to charge a customer in the future for an existing Stripe subscription or invoice
What happens during the checkout process?
When a customer uses a payment link, Loop will:- Create a new customer in Stripe or find an existing customer
- Tell Stripe about the product(s) being purchased
- Stripe creates an invoice based on the billing settings associated with the products and/or subscription purchased
- Loop charges the customer onchain based on the Stripe bill and checkout session settings
- Loop marks the invoice in Stripe as
paid, adding thetx hash,wallet addressandamountto the invoice’s metadata and saves this data in our backend for easy querying
Architecture
The base URL for all Loop payment links is:cs_01jtnkb6gafqfvhq4j37xydxdr This id is provided in the response to the Checkout Sessions endpoint and the full link is provided on the company dashboard.

demo to the link:
Important Notes
- Every checkout session will be a unique ID regardless if the details are the same
- By default checkout sessions expire in 14 days
- Currently, the tokens that a payment link can be paid with are defined at the product level. By default all items accept USDC on the networks that are deployed for your account. If you’d like to accept additional tokens, you can add them while creating the payment link on the dashboard or via API call to the update
_items_endpoint for all the products contained in the link. A link for multiple products will accept the subset of tokens that both products accept. - To apply a free trial to a subscription, you must set this as a parameter in the checkout sessions creation. This can be done with no-code or by API.
Creating a payment link
No-code
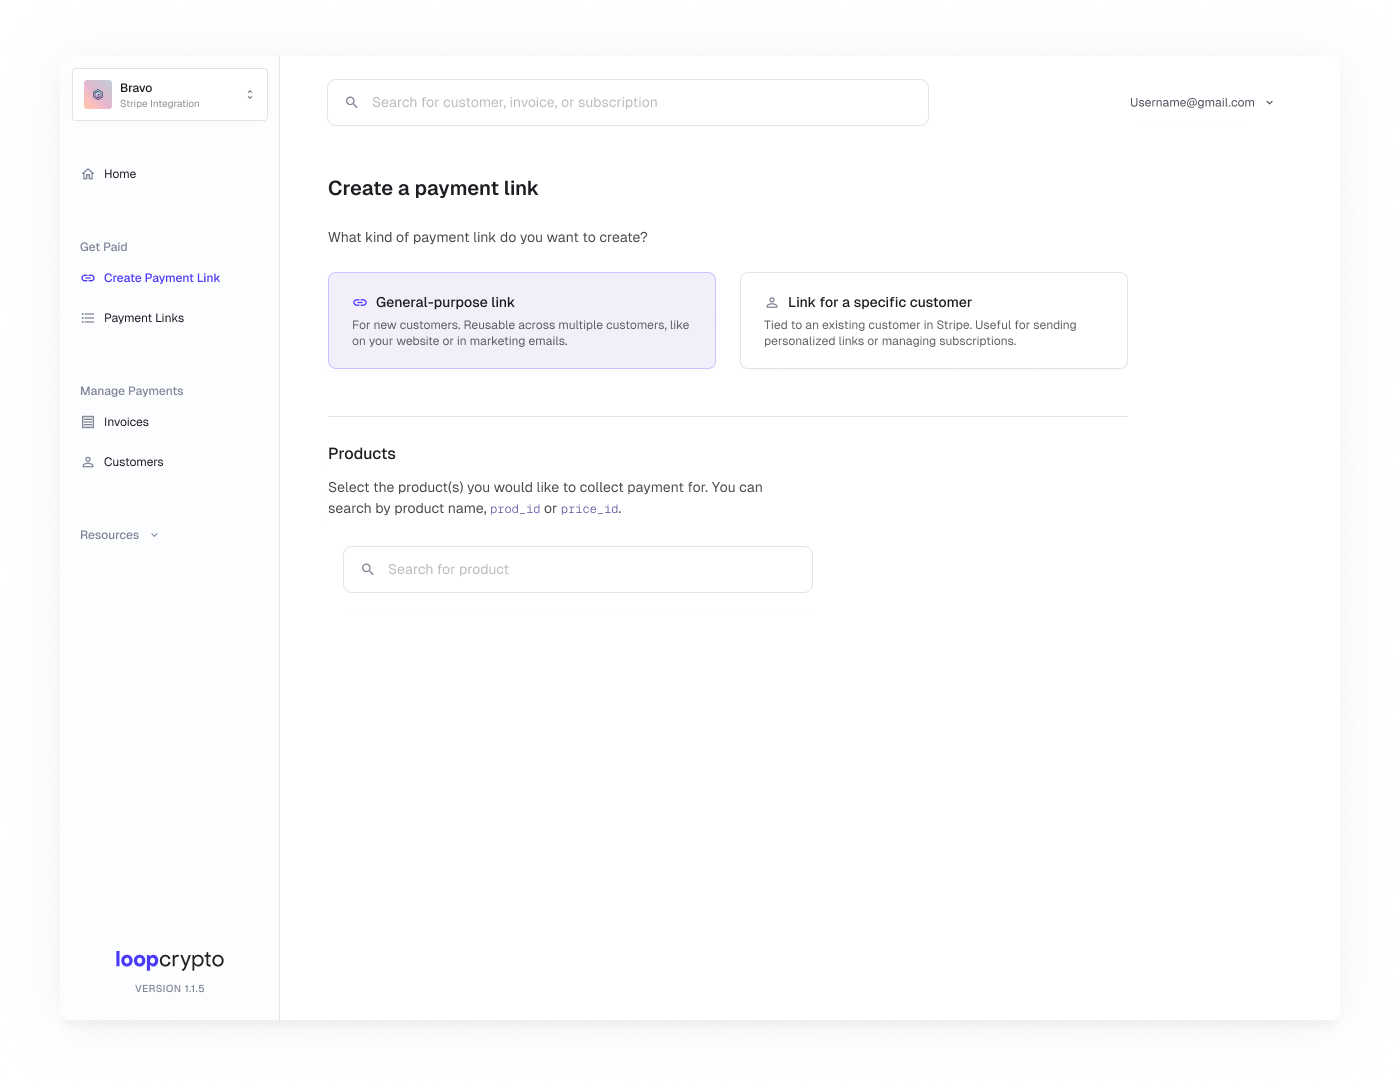
- General purpose link: For new customers. Reusable across multiple customers, like on your website or in marketing emails.
- Link for a specific customer: Tied to an existing customer in Stripe. Useful for sending personalized links or managing subscriptions.
FAQs
Can I programmatically generate checkout URLs?
Can I programmatically generate checkout URLs?
Yes, you can programmatically generate checkout URLs using the Create CheckoutSessions endpoint.
When should I generate checkout sessions dynamically vs. using the dashboard?
When should I generate checkout sessions dynamically vs. using the dashboard?
Generate checkout sessions from your front-end when you need to pass parameters that change with each purchase, such as reference IDs, success URL redirects, or metadata. This allows you to create links with unique parameters for each transaction. The pre-generated dashboard checkout URL works best for no-code solutions with static parameters.
Can I pre-fill the customer's email address?
Can I pre-fill the customer's email address?
Yes, you can automatically populate the email address using the
email parameter on the checkout sessions endpoint. When this parameter is provided, the email address is automatically filled on the checkout page and the customer cannot edit it.How does subscription billing work with Loop?
How does subscription billing work with Loop?
Each billing cycle, Stripe creates an invoice and Loop automatically listens for this invoice to charge the customer. As long as Stripe has a finalized invoice for the subscription and the customer’s payment method has no issues, Loop will charge the customer and mark the invoice in Stripe as paid.
How do payment authorizations work?
How do payment authorizations work?
What happens if a customer's authorization runs low?
What happens if a customer's authorization runs low?
Can I require customers to set a minimum authorization amount?
Can I require customers to set a minimum authorization amount?
How should I monitor payment confirmations?
How should I monitor payment confirmations?
We recommend listening to Stripe’s webhooks to confirm payments. However, if you passed parameters like reference IDs or metadata, you’ll need to listen to Loop’s
TransferProcessed webhook instead. These webhooks fire for both the initial payment and any recurring payments.When do Loop webhooks fire?
When do Loop webhooks fire?
Loop’s
TransferProcessed webhook fires for both the first payment and any recurring payments when you need to track custom parameters like reference IDs or metadata that aren’t available in Stripe’s webhooks.